August 15 Simplify Your Studio: How to Manage Network Cables for Musicians
in network cables
In the modern home studio, network connectivity is as essential as having the right tools and software. From streaming samples and collaborating online to backing up projects to the cloud, a solid network setup ensures seamless integration and functionality. However, a mess of network cables can quickly turn into a tangled nightmare. Efficient network cables not only enhance the aesthetic appeal of your studio, they also improve functionality and reduce downtime. Here’s how musicians can efficiently manage network cables in their home studios.
Understanding the importance of network cable management
1. Reliable Connection: Structured cables reduce the possibility of interruptions and interference, ensuring a stable network connection which is essential for online collaboration and streaming.
2. Aesthetic Appeal: A clean, well-organized studio is visually appealing and promotes an environment conducive to creativity.
3. SAFETY AND DURABILITY: Proper cable management reduces wear and tear on cables and ports, extending the life of your equipment and reducing the risk of tripping.
4. Easy Maintenance: Organized network cabling makes troubleshooting and upgrades easy, saving time and effort.
Steps to Effectively Manage Network Cables
Plan your network layout
Before you start organizing, plan the layout of your studio. Decide where your router, switches, computers, and other network-enabled devices will be placed. Consider the optimal location to minimize cable lengths and ensure efficient routing.
Label your cables
Labeling is a critical step in any network cabling installation. Use color-coded tags or labels to distinguish between different network cables, such as those connected to a router, switch, or specific devices. This makes it easier to identify and manage connections, especially when troubleshooting.
Use quality cables.
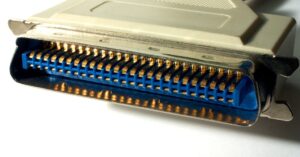
Invest in high-quality Ethernet cables. Cat6 or Cat7 cables are recommended for better performance and future-proofing. They provide faster speeds and greater reliability, reducing the chance of interference and data loss.


Use cable management tools.
Several tools can help you manage your network cables effectively:
Cable Ties and Velcro Straps: These are ideal for tying cables together. Velcro straps are especially useful because they can be easily adjusted and reused.
Cable Sleeves: Wrapping multiple cables inside a single sleeve provides a neat and organized look.
Cable Clips & Hooks: Mount them on walls or the underside of your desk to neatly route cables along surfaces.
Cable Trays and Wire Runners: Install them under desks or along walls to keep cables off the floor and out of sight.
Create custom paths
Establish specific routes for any network cables. Use cable clips and hooks to route cables along walls or under desks or other surfaces. Make sure to route power cables and network cables separately to minimize interference.
Optimize cable lengths
Avoid using excessively long cables that contribute to clutter. Use cables that are long enough to reach their destination without leaving too much slack. If the cable is too long, coil the excess length and secure it with a cable tie.
Implementation of the patch panel
For larger network cabling setups, consider using a patch panel. A patch panel allows you to centralize your network connections, making it easier to manage and reconfigure your network settings. This is especially useful if you have multiple devices that need to connect to the network.
Periodic maintenance and review
Cable management is not a one-time task. Review your setup regularly to ensure that all cables are secure and in good condition. Make adjustments as necessary, especially when adding or removing devices. You can always contact Bridge Cable to ensure that your cable management remains strong, and for assistance with any other network cabling installation services.
Practical Tips for Musicians
Use wireless solutions
While wired connections are often more stable, consider wireless solutions for devices that don’t require constant high-speed connections. Wireless keyboards, mice, and even some audio equipment can reduce the number of cables in your studio.
Document your network settings
Create a diagram or document detailing your network cable connections. This can be very useful for troubleshooting and when making changes to your settings. Note which cable connects to which port on each device and any specific configuration details.
Group similar cables together.
Group network cables with similar functions together, such as those for audio devices, computers, and streaming devices. This makes cable management and identification easier when you need them.
Install equipment strategically.
Mount networking equipment such as routers and switches on walls or under desks to clear up workspace and reduce clutter. Use brackets or shelves to keep these devices within easy reach but out of the way.
Managing network cables in your home studio is crucial to maintaining an efficient, safe, and inspiring workspace. By planning your layout, using the right tools, and maintaining your setup regularly, you can ensure that your studio remains a place where creativity thrives. Implement these strategies, and you’ll spend less time dealing with cable clutter and more time making music.
For assistance with any project or installation in the New Jersey or Philadelphia area, please call us at 877-832-1206.
For more ideas please visit – https://www.bridgecable.com/services/
All rights reserved to Bridge Cable © 2024.
Mail: 2745 Terwood Road, Willow Grove, PA 19090
Warehouse: 2066 W. Hunting Park Ave, STE 308, Philadelphia, PA 19140